April 16, 2018
Refrigerator Repair
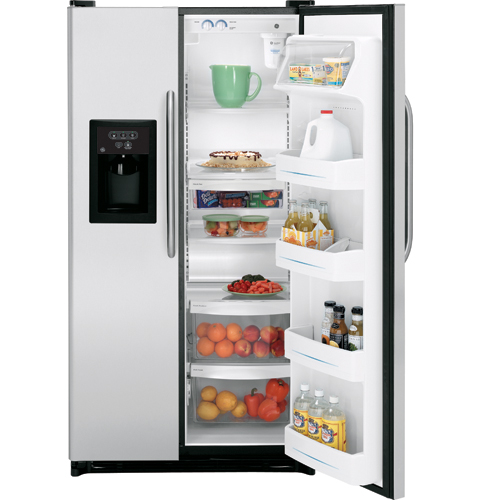
Have you recently noticed your GE refrigerator model BSS25JSRFSS is running more frequently and for longer periods of time? If your answer is yes, you may be dealing with a damaged door gasket. A failing gasket allows the cold air in your refrigerator to seep out, and the warmer air from outside to seep in, meaning, your appliance will struggle to maintain the proper temperature. Luckily, spotting and replacing a faulty gasket is a repair most individuals can handle on their own.
Inspect and Test the Gasket
Diagnosing a damaged door gasket is relatively easy. First, you will want to perform a simple visual inspection. Rips, mold, and loose sections are all signs the gasket needs replacing. If you don’t see any physical indications of a damaged door gasket, your second step is to test the gasket for gaps in its airtight seal. To do this, grab a dollar bill, and open your refrigerator’s door. Next, close the door with half of the dollar bill sticking out. Finally, try pulling the bill out or sliding it up and down the door. If the dollar bill slips out or moves with no resistance, the gasket is not forming an airtight seal, meaning you need to replace it.
How to Replace a GE Push-in Door Gasket
Before performing any type of refrigerator repair either unplug your appliance or turn it off at the circuit breaker.
-
Take the new door gasket out of its box and let it soak in warm water for around an hour. This will remove any creases or folds it acquired while in its packaging. Once the hour is up, allow the gasket to air dry before installing it.
-
Using a putty knife, pop a portion of the old gasket out of the refrigerator’s door frame. Next, slowly pull the rest of the damaged gasket away from the door.
-
Before you install the new gasket, wipe down the refrigerator’s door frame to ensure the area is clean.
-
To start the installation, push the corner’s of the new gasket into the top two corners of the door frame. Once the corners are snapped in, press the middle section into place. With only a little pressure, the lip on the backside of the gasket should easily fit into the groove on the door.
-
Next work your way down the sides of the door, pushing the gasket in as you go and across the bottom. To ensure the new gasket is secure, check for loose spots before completing the repair.
-
Plug your appliance back in, and enjoy your brand new door gasket.
If you’re still having problems with your refrigerator after you’ve replaced its door gasket, please contact us today and we’ll be happy to diagnose and repair the malfunction.w
Apr. 09, 2024
How to Fix Whirlpool Stove F9 Code
Apr. 09, 2024
Fix Whirlpool Duet’s F20 Error Code

Apr. 09, 2024
Freezer Working But Not Fridge? 5 Fixes

Mar. 06, 2024
Speed Queen Washer Error Codes Explained
Mar. 06, 2024
7 Reasons Why Your KitchenAid Ice Maker Isn’t Working
Mar. 06, 2024
LG Oven F9 Error: Here’s How to Fix It

Feb. 05, 2024
How to Replace an LG Refrigerator Air Filter

Feb. 05, 2024
What Do Dryer Sheets Do?

Feb. 05, 2024
How to Cook Corn on the Cob in the Microwave
Jan. 03, 2024
Bosch Dishwasher Showing E24 Error Code? Here’s What To Do
800-277-5043Give us a call

